The Canon AE-1 instruction manual is a comprehensive guide for mastering this iconic 35mm SLR camera. It provides detailed operation steps, troubleshooting tips, and maintenance advice, ensuring optimal use of the camera’s advanced features and functionality.
1.1 Overview of the Canon AE-1 Camera
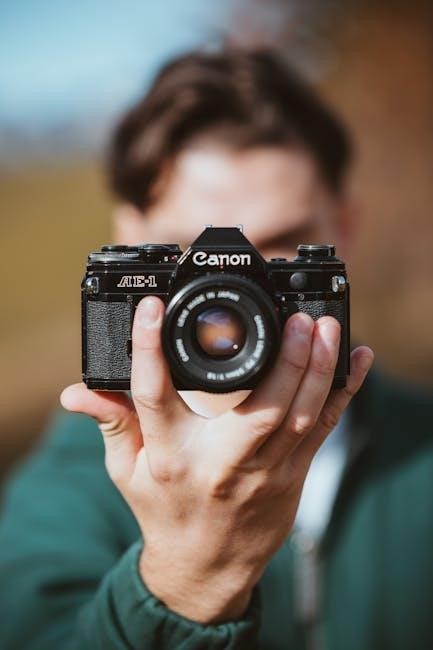
The Canon AE-1, introduced in 1976, is a legendary 35mm SLR camera renowned for its durability and intuitive design. It features multiple exposure modes, including Programmed AE, Shutter-Speed Priority, and Aperture Priority, making it versatile for both professionals and hobbyists. Compatible with Canon FD lenses, the AE-1 offers advanced functionality, including a built-in light meter, manual override, and compatibility with external accessories, ensuring exceptional photography experiences.
1.2 Importance of the Instruction Manual
The Canon AE-1 instruction manual is essential for understanding the camera’s features, troubleshooting common issues, and maintaining optimal performance. It provides detailed guidance on operation, exposure modes, and accessories, ensuring users can fully utilize the camera’s capabilities. Whether you’re a beginner or an experienced photographer, the manual is a vital resource for mastering the AE-1 and achieving exceptional photography results.

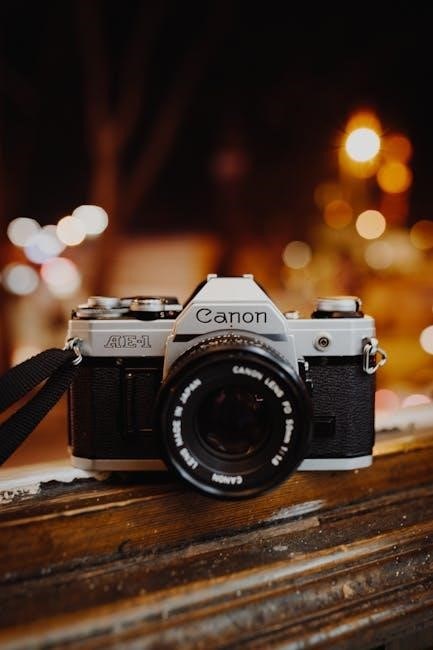
Naming the Parts of the Canon AE-1
This section provides a detailed overview of the Canon AE-1’s components, including the top view, bottom view, and key functional parts, ensuring proper identification and operation.
- Top view components: Shutter button, mode dial, frame counter, and ASA dial.
- Bottom view components: Tripod socket, battery compartment, and film rewind button;
2.1 Top View Components
The Canon AE-1’s top view features essential controls for operation. Key components include the shutter button, mode dial, frame counter, ASA dial, and lens release button. These elements are strategically placed for easy access and intuitive use, allowing photographers to adjust settings efficiently while maintaining focus on composition and shooting.
- Shutter button: Activates the shutter mechanism to capture images.
- Mode dial: Selects exposure modes, including Programmed AE, Shutter-Speed Priority, and Manual.
- Frame counter: Displays the number of exposures taken or remaining on the film roll.
- ASA dial: Sets the film speed sensitivity for proper exposure calculations.
- Lens release button: Used to mount or remove Canon FD lenses.
2.2 Bottom View Components
The bottom of the Canon AE-1 features essential components for stability and power management. These include the tripod socket, battery compartment, and a small lever for accessing the battery. The tripod socket allows for secure mounting, while the battery compartment houses the 4LR44 or 1CR14250 lithium batteries needed to power the camera’s metering system and electronic functions.
- Tripod socket: Ensures stable mounting for tripod use.
- Battery compartment: Holds the camera’s power source.
- Access lever: Facilitates easy battery replacement.
Loading Film into the Canon AE-1
Loading film into the Canon AE-1 is a straightforward process requiring careful attention to ensure proper alignment and avoid exposure to light.
3.1 Step-by-Step Film Loading Process
Open the camera back by pulling the film rewind knob. Insert the film cartridge, ensuring the leader aligns with the spool. Gently close the back, then advance the film by turning the rewind knob counterclockwise until it stops. Check the exposed film indicator to confirm the film is loaded correctly.
3.2 Ensuring Proper Film Alignment
Align the film leader with the spool’s red marking. Gently pull the film to ensure it sits flat in the camera. Close the back and advance the film by turning the rewind knob counterclockwise until it stops. Check the film counter to confirm it starts at “1.” Proper alignment ensures smooth film transport and prevents exposure issues.

Understanding Exposure Modes
The Canon AE-1 offers multiple exposure modes, including Programmed AE, Shutter-Speed Priority AE, Aperture Priority AE, and Manual Override. This section explains each mode and how to use them effectively for optimal results.
4.1 Programmed AE Mode
The Programmed AE Mode on the Canon AE-1 allows the camera to automatically set both aperture and shutter speed for optimal exposure. This fully automatic mode simplifies photography, enabling users to capture sharp images without manual adjustments. It’s ideal for beginners or quick shots, providing ease of use while maintaining high-quality results in various lighting conditions.
4.2 Shutter-Speed Priority AE Mode
In Shutter-Speed Priority AE Mode, users manually set the shutter speed, and the camera automatically adjusts the aperture for correct exposure. This mode is ideal for controlling motion effects, such as freezing action or creating blur. It offers creative control while maintaining ease of use, making it suitable for various lighting conditions and photography styles.
4.3 Aperture Priority AE Mode
In Aperture Priority AE Mode, users manually set the aperture, and the camera automatically adjusts the shutter speed for optimal exposure. This mode allows precise control over depth of field, making it ideal for portraits, landscapes, and creative compositions. It balances manual control with automatic convenience, ensuring versatility for photographers of all skill levels.
4.4 Manual Override Option
The Manual Override Option on the Canon AE-1 allows photographers to take full control of both aperture and shutter speed, bypassing automatic settings. This mode is ideal for experienced users who prefer precise control over exposure. By manually adjusting both f-stop and shutter speed, photographers can achieve creative results tailored to their vision, especially in challenging lighting conditions.

Focusing and Metering
The Canon AE-1 offers precise focusing techniques and a built-in light meter for accurate exposure control, ensuring sharp images and optimal lighting in various photography conditions.
5.1 Focusing Techniques for Sharp Images
To achieve sharp images with the Canon AE-1, master its focusing techniques. Use the viewfinder’s split-image microprism for precise alignment. Employ the depth of field preview button to gauge focus range. Experiment with optional focusing screens for specialized photography. In low light, consider external illumination or manual adjustments. For moving subjects, anticipate and track with smooth focus ring movements. Practice with stationary objects first, then progress to dynamic shots, ensuring stability with a tripod to minimize camera shake and enhance focus accuracy. Regular practice will refine your technique, leading to consistently sharp results.
5.2 Using the Built-In Light Meter
The Canon AE-1’s built-in light meter simplifies exposure control. It offers aperture priority, shutter-speed priority, and manual modes. In aperture priority, set the aperture and the meter selects the shutter speed. In shutter-speed priority, choose the shutter speed and the meter adjusts the aperture. For manual mode, the meter provides a reference for optimal settings. The light meter also supports flash photography and is compatible with a range of film speeds, ensuring accurate exposures in various lighting conditions. Regular use enhances your understanding of light and improves your photography skills. It is essential to familiarize yourself with the meter’s operation for consistent results. Whether you’re a novice or an advanced photographer, the light meter is a valuable tool for achieving professional-quality images.

Accessories for the Canon AE-1
The Canon AE-1 supports a range of accessories, including FD-series lenses, flashes, and remote shutters, enhancing its functionality for diverse photography needs and improving creative control.
6.1 Compatible Lenses
The Canon AE-1 is compatible with FD-series lenses, designed to work seamlessly with its advanced features. These lenses ensure proper aperture control and metering. For non-FD lenses, manual stop-down metering is required. The manual provides detailed guidance on lens compatibility and usage, helping photographers optimize their setup for exceptional image quality and creative control. Proper lens maintenance is also emphasized for longevity and performance.
6.2 Optional Accessories for Enhanced Functionality
Optional accessories like flash units, remote shutters, and camera cases enhance the Canon AE-1’s functionality. Flash units provide external lighting control, while remote shutters minimize camera shake. Additional accessories, such as data books and manuals, offer advanced settings and tips for optimal performance. These tools help photographers explore creative possibilities and improve their shooting experience with the AE-1.
Troubleshooting Common Issues
The Canon AE-1 manual provides solutions for common problems like shutter malfunctions, aperture issues, and film advance errors. It guides users through diagnostic steps and repairs.
7.1 Resolving Shutter and Aperture Problems
The Canon AE-1 manual offers detailed solutions for shutter and aperture issues. It provides step-by-step guidance for diagnosing and repairing mechanical faults. Techniques include cleaning, adjusting, and replacing faulty components. Users can restore proper functionality by following these expert troubleshooting methods, ensuring optimal performance from their camera.
7.2 Addressing Film Advance and Rewind Issues
The Canon AE-1 manual provides solutions for film advance and rewind problems. It includes steps to resolve jammed film, improper alignment, and faulty mechanisms. Users can fix issues by cleaning the film path, ensuring proper film tension, and lubricating moving parts. These troubleshooting methods help restore smooth film handling and ensure reliable camera operation.
Maintenance and Care
Regularly clean the camera with a soft cloth, avoiding harsh chemicals. Store in a dry place to prevent moisture. Check for dust and ensure proper lubrication of moving parts.
8.1 Cleaning the Camera and Lens
To maintain your Canon AE-1, use a microfiber cloth to gently wipe the camera body and lens. Dampen the cloth with distilled water for stubborn marks, avoiding internal components. For the lens, use a lens cleaning tissue in circular motions, starting from the center. Avoid chemicals and never touch the lens surface with bare hands.
8.2 Storing the Camera Properly
Store the Canon AE-1 in a cool, dry place away from direct sunlight and moisture. Use silica gel packets to prevent humidity damage. Keep the camera in its original case or a protective bag to avoid scratches. Avoid extreme temperatures and ensure the camera is clean before storage to maintain its functionality and longevity.
The History and Legacy of the Canon AE-1
Released in 1976, the Canon AE-1 revolutionized photography with its user-friendly design and advanced features, becoming a favorite among professionals and hobbyists, and leaving a lasting legacy in film photography.
9.1 Impact on Film Photography
The Canon AE-1, introduced in 1976, significantly influenced film photography by offering an affordable, user-friendly SLR camera. Its advanced features and ease of use made it accessible to both professionals and hobbyists, democratizing photography and fostering creativity. The camera’s popularity helped establish Canon as a leading brand, leaving a lasting legacy in the world of film photography.
9.2 Popularity Among Photographers
The Canon AE-1 gained immense popularity among photographers due to its user-friendly design, durability, and versatility. It appealed to both professionals and enthusiasts, offering advanced features like aperture priority and manual override. Its compatibility with Canon FD lenses further enhanced its appeal, making it a favorite for capturing high-quality images across various genres of photography.

Advanced Shooting Techniques
Explore advanced techniques for the Canon AE-1, including the use of flash, external lighting, and experimenting with different film speeds to achieve unique photographic effects and enhance creativity.
10.1 Using Flash and External Lighting
Master the use of flash and external lighting with the Canon AE-1 to enhance your photography. The camera supports flash units via its hot shoe and sync terminal, enabling precise control over lighting. Experiment with external light sources, such as studio strobes or natural light, to create dynamic and professional-looking images. Proper synchronization ensures balanced exposures and vibrant results.
10.2 Experimenting with Different Film Speeds
Experimenting with different film speeds (ISO) enhances your creative control. The Canon AE-1 supports a wide range of film speeds, from ISO 12 to 3200. Lower ISOs (e.g., 100, 200) are ideal for bright lighting, while higher ISOs (e.g., 400, 800) perform better in low-light conditions. Adjusting film speed allows you to capture crisp, well-exposed images in various environments, ensuring flexibility for diverse photographic needs.
11.1 Final Tips for Mastering the Canon AE-1
Practice regularly to refine your skills. Experiment with different film speeds and lighting setups. Always clean and maintain your camera for optimal performance. Understand the exposure modes thoroughly. Use the manual override for creative control. Store your camera properly when not in use. Consult the manual for troubleshooting common issues. Join photography communities for shared insights and inspiration. Happy shooting!