Welcome to the Carrier Edge Thermostat Manual, your comprehensive guide to understanding and operating the Edge series thermostats. This manual provides detailed instructions for installation, programming, and troubleshooting, ensuring optimal performance and energy efficiency for your HVAC system. Designed for both residential and commercial use, the Edge thermostat offers advanced features like programmable scheduling, humidity control, and compatibility with various heating and cooling systems. Whether you’re a homeowner or a professional, this manual will help you unlock the full potential of your Carrier Edge Thermostat.
1.1 Overview of the Carrier Edge Thermostat
The Carrier Edge Thermostat is a wall-mounted, low-voltage device designed for precise temperature and humidity control. It offers programmable scheduling, allowing users to customize heating and cooling settings for up to 7 days. With a sleek, modern design, it features a backlit display for easy operation. The thermostat supports multiple heating and cooling stages and is compatible with various HVAC systems, including gas, electric, and heat pumps. Its advanced humidity control and programmable fan settings enhance comfort and energy efficiency, making it a versatile solution for both residential and commercial environments.
1.2 Importance of the Manual for Users
The Carrier Edge Thermostat Manual is essential for users to maximize the device’s functionality and efficiency. It provides clear instructions for installation, programming, and troubleshooting, ensuring proper setup and operation. The manual helps users understand advanced features like programmable scheduling, humidity control, and compatibility with various HVAC systems. By following the guidelines, users can optimize energy consumption, maintain comfort, and extend the lifespan of their thermostat. Whether troubleshooting issues or customizing settings, this manual serves as a vital resource for both novice and experienced users, ensuring they get the most out of their Carrier Edge Thermostat.

Key Features of the Carrier Edge Thermostat
The Carrier Edge Thermostat offers programmable scheduling, humidity control, and compatibility with various HVAC systems. Its advanced features include a large backlit display, vacation mode, and an Expansion Port for custom programming. Designed for energy efficiency and comfort, it supports multiple heating and cooling stages, making it versatile for different setups. These features ensure precise temperature control, ease of use, and adaptability to user needs, providing a reliable solution for home and commercial environments.
2.1 Programmable Scheduling Options
The Carrier Edge Thermostat offers flexible programmable scheduling options to suit various lifestyles. Users can set 7-day, 5/2-day, or 1-day schedules with up to four periods per day. This allows for customized heating and cooling set points, ensuring comfort and energy efficiency. The thermostat’s intuitive interface makes it easy to adjust schedules using the UP and DOWN buttons. Additionally, the Edge Expansion Port enables programming via a digital memory card, providing even greater convenience. These features allow users to tailor their temperature settings precisely, optimizing both comfort and energy savings throughout the day.
2.2 Humidity Control and Dual Setpoints
The Carrier Edge Thermostat features advanced humidity control, integrating seamlessly with temperature management. Dual setpoints allow users to configure separate settings for heating and cooling, ensuring precise comfort levels. This thermostat also supports humidification and dehumidification, maintaining optimal indoor air quality. The dual setpoint functionality enhances energy efficiency by preventing unnecessary heating or cooling. Compatible with various HVAC systems, the Edge thermostat ensures consistent humidity levels, adapting to your home’s unique needs for improved comfort and energy savings throughout the year.
2.3 Compatibility with HVAC Systems
The Carrier Edge Thermostat is designed to work seamlessly with a wide range of HVAC systems, including gas, oil, electric, and heat pump configurations. It supports up to 4 heating stages and 2 cooling stages, offering flexibility for diverse climate control needs. Compatible with zone control systems, this thermostat ensures efficient operation in multi-zone setups. Its advanced technology allows it to integrate with various HVAC equipment, providing precise temperature control and energy efficiency. Whether for residential or commercial use, the Edge thermostat adapts to your system, ensuring reliable performance and optimal comfort.

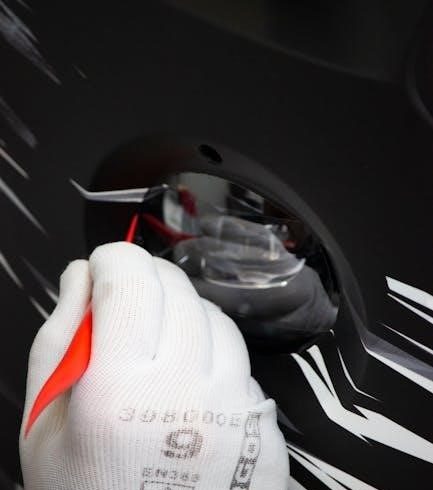
Installation and Wiring Instructions
Before installing your Carrier Edge Thermostat, ensure the power to your HVAC system is turned off. Follow the manual’s safety guidelines and local electrical codes. Mount the wall plate securely, connect the wires according to the wiring diagram, and ensure all connections are tight. After wiring, attach the thermostat to the wall plate and test the system to confirm proper operation. Refer to the manual for detailed instructions and specific wiring configurations to ensure a safe and successful installation.
3.1 Pre-Installation Considerations
Before installing the Carrier Edge Thermostat, ensure the power to your HVAC system is turned off at the circuit breaker. Verify system compatibility with the thermostat’s specifications. Choose a wall location away from direct sunlight, drafts, and outside walls for accurate temperature readings. Check wiring compatibility and ensure all necessary tools are available. Review local electrical codes and safety guidelines. If your system uses a backup battery, install it before mounting the thermostat. Familiarize yourself with the wiring diagram provided in the manual to avoid errors during installation.
3.2 Step-by-Step Wiring Guide
Connect the HVAC system wires to the corresponding terminals on the Carrier Edge Thermostat. Ensure the common wire is properly connected for continuous power. Match each wire to the correct terminal (e.g., R, W, Y, G, C) as per the manual. Secure all connections tightly to avoid loose wires. After wiring, turn the power back on and test the system to ensure proper operation. Refer to the wiring diagram in the manual for specific configurations. Always turn off power at the circuit breaker before starting the wiring process to ensure safety.

Programming the Thermostat
Programming your Carrier Edge Thermostat is straightforward, allowing you to customize schedules and settings for optimal comfort and energy efficiency. Explore this section for detailed guidance.
4.1 Setting Heating and Cooling Set Points
To set heating and cooling temperatures, press the soft key under the heat set point and adjust using the UP or DOWN buttons. Repeat for the cool set point. Use the arrow buttons to select different time periods (e.g., occ1, occ2) and adjust temperatures accordingly. For each period, ensure settings are customized to your preference. After configuring all periods, press DONE to save changes. This ensures consistent temperature control throughout the day, optimizing comfort and energy efficiency. Properly set points help maintain ideal indoor conditions while reducing energy consumption.
4.2 Customizing Daily and Weekly Schedules
Customize your Carrier Edge Thermostat by setting unique temperature profiles for each day or period. Use the arrow buttons to navigate through days (Mon-Sun) and periods (e.g., morning, evening). Press the soft key under the set point to adjust heating or cooling temperatures for the selected period. For 7-day schedules, customize each day independently. For 5/2-day schedules, set one program for weekdays and another for weekends. Save changes by pressing DONE. This feature allows you to tailor your comfort settings to your lifestyle, ensuring energy efficiency and consistent comfort throughout the week.
4.3 Advanced Programming Features
The Carrier Edge Thermostat offers advanced programming features for enhanced control and energy savings. Use vacation mode to set temporary temperature adjustments while away, ensuring energy efficiency. The smart recovery feature allows the system to gradually adjust to your scheduled temperature before the set time. Additionally, you can enable remote access via the ExP Expansion Port to program the thermostat using a digital memory card on your computer. These features provide flexibility and precision, allowing you to customize your heating and cooling preferences for optimal comfort and energy management.

Troubleshooting Common Issues
Address common issues like the thermostat screen not turning on or changes not saving. Resetting the device or replacing it may resolve persistent problems effectively.
5.1 Thermostat Screen Not Turning On
If the Carrier Edge thermostat screen fails to turn on, first ensure the device is properly powered. Check circuit breakers or fuses. Verify wiring connections are secure and correct. If using batteries, replace them with fresh ones. Reset the thermostat by turning off power at the breaker for 30 seconds. If issues persist, inspect for visible damage or faulty wiring. Consult the manual for specific reset procedures or contact a professional for assistance. Persistent problems may require thermostat replacement.
5.2 Issues with Saving Changes
If changes aren’t saving on your Carrier Edge thermostat, open the thermostat door and press the buttons under the heat and cool set points simultaneously until the desired settings appear. Use the UP or DOWN arrows to adjust, then press DONE to save. If issues persist, reset the thermostat by turning off power at the breaker for 30 seconds. Consult the manual for specific reset instructions or contact a professional if problems continue. Ensure proper wiring and power supply for optimal performance.

Maintenance and Care Tips
Regularly clean the thermostat screen and ensure proper power supply. Replace batteries as needed and avoid exposing the device to direct sunlight or moisture. Maintain proper installation and wiring to ensure optimal performance and energy efficiency.
6.1 Cleaning the Thermostat
Regular cleaning ensures optimal performance and longevity of your Carrier Edge Thermostat. Turn off the power before cleaning to avoid accidental settings changes. Use a soft, dry cloth to gently wipe the screen and exterior, removing dust and dirt. Avoid harsh chemicals or liquids, as they may damage the display or internal components. For stubborn marks, lightly dampen the cloth with water, but ensure no moisture enters the device. Cleaning helps maintain accurate temperature readings and prevents malfunctions, keeping your HVAC system running smoothly and efficiently.
6.2 Battery Replacement and Care
To maintain your Carrier Edge Thermostat’s functionality, replace the batteries when the low battery indicator appears. Open the battery compartment located on the back or bottom of the device. Use high-quality, alkaline batteries (AA or AAA, depending on your model) for optimal performance. Avoid mixing old and new batteries to prevent power discrepancies. Clean the battery terminals with a soft cloth before installing new ones. Proper battery care ensures reliable operation, accurate temperature control, and prevents system malfunctions. Replace batteries every 12-18 months or as indicated by the thermostat.

Frequently Asked Questions
Find answers to common questions about the Carrier Edge Thermostat, including ideal temperature settings, thermostat placement, and troubleshooting tips for optimal performance and energy efficiency.
7.1 Ideal Room Temperature Settings
The ideal room temperature for comfort and energy efficiency is typically between 19°C and 22°C. This range balances comfort and energy savings. For optimal conditions, set your Carrier Edge Thermostat to 20°C when home and awake, and slightly lower (around 15°C) when sleeping or away. Adjustments may vary based on personal preference, humidity levels, and seasonal changes; Use the programmable features to maintain consistent temperatures and reduce energy consumption.
7.2 Thermostat Placement Recommendations
For optimal performance, place the Carrier Edge Thermostat approximately 1.5 meters above the floor in a frequently used room, such as the living room or kitchen. Avoid direct sunlight, exterior walls, or areas near heating vents to ensure accurate temperature readings. The thermostat should not be placed in drafty areas or near windows to prevent false temperature readings. Proper placement ensures consistent comfort and energy efficiency, allowing the thermostat to accurately sense and regulate the room temperature effectively.