Dip powder nails are a popular, long-lasting manicure method offering durability and vibrant colors․ They involve dipping nails into colored powder for a strong, chip-resistant finish without UV light․
1․1 What Are Dip Powder Nails?
Dip powder nails are a type of manicure that uses a combination of powder and liquid to create a durable, long-lasting finish․ They are applied by dipping the nail into colored powder, resulting in a strong, chip-resistant surface․
This method avoids the need for UV light, making it a popular alternative to gel or acrylic nails․ The process involves multiple layers of powder and activator to achieve a glossy, professional-looking result․
1;2 Benefits of Dip Powder Nails
Dip powder nails are known for their durability and long-lasting finish, often lasting up to six weeks without chipping․ They are also low-maintenance and don’t require UV light, making them a healthier alternative to gel or acrylic nails․
The process is quick, and the wide range of colors and finishes offers versatility․ Dip powder nails are also less damaging to natural nails compared to traditional acrylics, promoting healthier nail growth over time․
Preparing Your Nails for Dip Powder
Preparing your nails involves cleaning, shaping, and ensuring they are free of oils and residue․ This step ensures a smooth and long-lasting dip powder application․
2․1 Cleaning and Sanitizing Your Nails
Cleaning and sanitizing your nails are crucial for a successful dip powder application․ Use isopropyl alcohol or a nail cleanser to remove oils, dirt, and residue․ This ensures proper adhesion and prevents lifting․ Sanitize tools and hands to maintain hygiene, essential for a professional finish and long-lasting results without damage or infections․
2․2 Shaping and Filing Your Nails
Shaping and filing your nails are essential steps before applying dip powder․ Use a nail file to achieve your desired shape, ensuring smooth edges․ Gently buff the surface to remove ridges, creating a porous texture for better powder adhesion․ This step ensures a flawless, long-lasting finish and prevents uneven application, enhancing the overall manicure quality and durability․
Applying the Base Coat
Applying the base coat is the next step, using a thin, even layer applied to 3/4ths of the nail for proper adhesion and a smooth finish․
3․1 Choosing the Right Base Coat
Selecting the right base coat is essential for a successful dip powder application․ Opt for a high-quality, thin formula that adheres well to the nail surface․ The base coat should be labeled as “1” in most dip kits, ensuring proper preparation and bonding for the powder․ Apply it evenly, avoiding the cuticles, to create a smooth foundation for the dip powder layers․
3․2 Applying a Thin, Even Layer
Applying a thin, even layer of base coat is crucial for a smooth finish․ Use quick, steady strokes to cover the nail surface, ensuring complete coverage without pooling at the edges․ Avoid overloading the brush, as excess base coat can lead to uneven powder adhesion․ Allow it to dry completely before proceeding to the dipping step for optimal results․

Dipping Your Nails in Powder
Dipping involves submerging your nail into the powder at a 45-degree angle, ensuring even coverage․ Gently tap off excess powder for a smooth, professional finish․
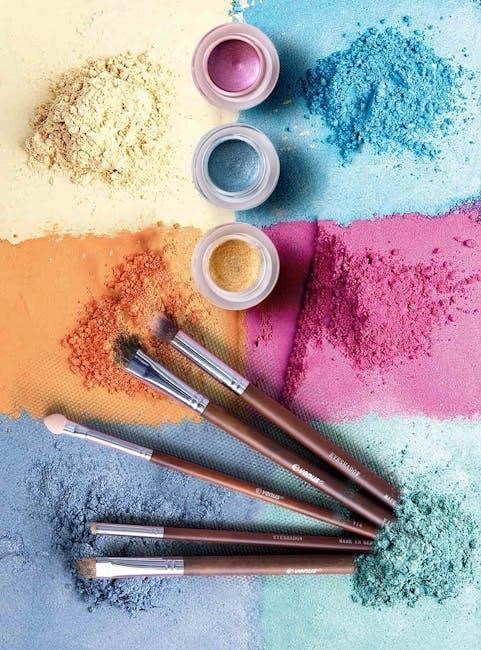
4․1 Selecting the Right Powder Color
Choosing the right powder color involves considering skin tone, personal style, and occasion․ Opt for neutral shades for versatility or bold hues for a statement look․ Ensure the color complements your nail shape and desired aesthetic․ Many kits offer guides to help match preferences, making selection easier for beginners and professionals alike․
4․2 Dipping Technique: 45-Degree Angle
Dip the nail into the powder at a 45-degree angle, ensuring even coverage․ Gently tap off excess powder and use a fluffy brush to remove․ This technique prevents clumping and ensures a smooth, professional finish․ Proper angling allows the powder to adhere evenly, creating a durable and chip-resistant surface․

Using the Activator
Apply a generous amount of activator to seal the powder and promote drying․ Ensure even coverage and allow it to dry completely before proceeding to the next step․
5․1 Applying the Activator
Apply a thin, even layer of activator to the entire nail surface after dipping․ Ensure full coverage to seal the powder and promote drying․ Use a brush to spread evenly, avoiding cuticles․ A lint-free wipe can remove excess activator at the cuticle area for a clean finish․ Proper application ensures the powder adheres well and the manicure lasts longer․
5․2 Allowing the Activator to Dry
After applying the activator, let it dry completely․ You’ll know it’s dry when tapping the nail produces a slight clicking sound․ Avoid touching or handling the nails during this time․ Proper drying ensures the activator fully binds the powder to the nail, creating a strong, durable finish․ This step is crucial for long-lasting results․

Sealing with Top Coat
Sealing with a top coat is essential for protecting the dip powder and adding shine․ Apply a thin, even layer and let it dry completely for a glossy finish․
6․1 Applying the Top Coat
Apply a thin, even layer of top coat to seal the dip powder․ Use a light touch, starting at the center and sweeping toward the tips․ Ensure full coverage for a glossy finish and long-lasting wear․ Allow the top coat to dry completely before handling anything to prevent smudging or damage․
6․2 Ensuring Longevity
To ensure your dip powder nails last, avoid using harsh chemicals and wear gloves when washing dishes or cleaning․ Regularly moisturize cuticles and nail beds to prevent brittleness․ Avoid excessive exposure to water, as it can weaken the bond between the nail and powder․ Touch-ups can help maintain the manicure’s appearance and extend its wear up to six weeks․
Filing and Buffing
Filing shapes the nails to your desired form, while buffing smooths the surface for a polished finish․ Both steps enhance the manicure’s appearance and ensure a professional-looking result․
7․1 Shaping the Nails
Shaping the nails is a crucial step in achieving a professional look․ Using a medium-grit nail file, carefully shape each nail to your desired length and form, ensuring smooth edges and a natural appearance․ File in one direction to avoid weakening the nails, and maintain a consistent angle for a balanced finish․ This step ensures your dip powder manicure looks polished and refined․
7․2 Smoothing the Surface
After shaping, use a buffer block to gently smooth the nail surface, removing any ridges or dust․ Lightly buff in one direction to maintain evenness․ This step ensures a polished finish and prepares the nail for further treatments․ Use a lint-free wipe to clean away dust, creating a smooth canvas for the next steps in your dip powder application process․

Finishing Touches
Finish by pampering your cuticles with nourishing oil and gently cleaning around the nails to remove any excess powder, ensuring a clean, polished look․
8․1 Cuticle Care
After completing your dip powder manicure, gently massage nourishing oil into your cuticles to hydrate and protect them․ This step ensures healthy nail growth and maintains the overall appearance of your nails․ Use a cuticle pusher to carefully remove any dead skin, then apply a rich cuticle oil to keep the area moisturized and soft․ Regular cuticle care prevents dryness and promotes nail health․
8․2 Final Clean-Up
Use a lint-free wipe or cotton ball dipped in acetone or nail cleanser to gently remove excess powder around the cuticles and nail bed․ This ensures a clean finish and prevents unevenness․ Lightly buff the nails to smooth any ridges, creating a polished look․ Final clean-up is essential for a professional finish and long-lasting results․
Essential Tools and Kit
A complete dip powder kit includes base coat, activator, top coat, colored powders, nail file, brush, and cuticle tools, ensuring all necessary items for application․
9․1 Must-Have Products
Essential products for a dip powder manicure include a base coat, activator, top coat, dipping powders, a four-way nail file, a soft brush for excess powder, and a cuticle pusher․ These tools ensure a smooth, professional application and long-lasting results․ Kits often bundle these items, making it easy to achieve salon-quality nails at home․
9․2 DIY vs․ Professional Kits
DIY kits offer an affordable, at-home solution with essential products like base coat, activator, and powders, perfect for beginners․ Professional kits provide advanced tools and extensive color options, ideal for frequent applications or salon use․ Both options ensure high-quality results, catering to different skill levels and needs․
Aftercare and Maintenance
Proper aftercare ensures long-lasting dip powder nails․ Avoid harsh chemicals, keep nails moisturized, and clean cuticles regularly․ Use nourishing oils and address minor chips promptly for optimal results․
10․1 Tips for Long-Lasting Results
To ensure your dip powder nails last, avoid harsh chemicals and excessive water exposure․ Moisturize your cuticles regularly and avoid using nails as tools․ Wear gloves when cleaning or gardening, and avoid extreme temperatures․ Touch up chips promptly and consider professional fills․ These practices will help maintain the integrity and appearance of your dip powder manicure for weeks․
10․2 Troubleshooting Common Issues
Common issues with dip powder nails include uneven application, excess powder, or lifting․ To fix, ensure proper prep, apply thin layers, and avoid over-dipping․ If the activator doesn’t dry, reapply a thin coat․ For powder around cuticles, use a fluffy brush to gently sweep away excess․ Addressing these issues promptly ensures a professional, long-lasting finish․