
Materials Needed for a Tie Blanket
To make a tie blanket, you’ll need two pieces of fleece fabric, each 1․5 yards․ Essential tools include sharp scissors, a ruler, or a rotary cutter․ Optional items are safety pins for alignment and cardboard for cutting stability․
Fleece Fabric Requirements
To create a tie blanket, you typically need two pieces of fleece fabric, each measuring 1․5 yards in length․ The width of the fleece is usually 60 inches, which is standard for most projects․ For a standard blanket, the finished size is often around 60 inches by 70 inches, but this can be adjusted based on your preference․ It’s important to ensure the fleece is soft and suitable for blankets․ You may also trim the selvage edges, which are the rough, finished edges of the fabric, to prevent them from being visible in the final product․ Always measure the fabric accurately to ensure both pieces are the same size for a professional finish․ This step ensures your blanket will be even and visually appealing․ By following these guidelines, you’ll have the perfect fabric to start your project․
Tools: Scissors, Ruler, or Rotary Cutter
Sharp scissors are essential for cutting the fleece fabric cleanly and efficiently․ A long ruler or rotary cutter is necessary for accurate measurements and straight cuts․ A rotary cutter is particularly useful for making precise cuts, especially for larger blankets․ Ensure your scissors are sharp to avoid fraying the fleece edges․ A ruler helps measure and mark the fabric evenly, while a rotary cutter simplifies cutting through thick fabric layers․ Optional tools include safety pins to align the fabric layers and cardboard to provide a stable cutting surface․ Having these tools ready ensures a smooth and professional-looking finish․ Proper tools are crucial for achieving clean cuts and accurate measurements, making the process easier and faster․ By using the right tools, you can avoid mistakes and ensure your tie blanket turns out perfectly․ Sharp tools are a must to handle the thick fleece fabric effectively․ This step ensures your blanket has a polished appearance and lasts for years to come․

Step-by-Step Instructions to Make a Tie Blanket
Start by cutting the fleece into two equal-sized pieces․ Remove the selvage edges and fringe the fabric by cutting strips along all sides․ Tie the fringe strips together in square knots, ensuring even spacing and secure knots for a cozy finish․
Cutting the Fleece
Begin by laying the two pieces of fleece on a flat surface, ensuring they are aligned evenly․ Use sharp scissors or a rotary cutter to trim the selvage edges from all sides of both fleece pieces․ This step prevents the edges from curling or fraying during the tying process․
Next, cut 4-inch squares from each corner of both fleece pieces․ This helps eliminate bulk when tying the knots and ensures a neat, professional finish․ Carefully measure and mark the corners to maintain consistency across all sides․
After trimming the corners, cut 1-inch wide strips along all four edges of both fleece pieces, spacing them evenly․ These strips will form the fringe that you’ll tie together later․ Use a ruler or rotary cutter to achieve straight, precise cuts․
Once the fringe is cut, use safety pins to secure the two fleece layers together, aligning the edges carefully․ This prevents the layers from shifting while you work on tying the knots․ Double-check your cuts to ensure uniformity before proceeding․
Preparing the Fringe
After cutting the fringe, inspect each strip to ensure they are of equal length and width․ If necessary, trim any uneven strips to maintain consistency․ This step is crucial for a polished appearance and even tying․

Next, separate the fringe strips slightly to prevent them from tangling․ Gently tease apart any strips that may have bunched together during the cutting process․ This makes it easier to work with each strip individually․
Align the two layers of fleece, ensuring the fringes match up perfectly․ Use large safety pins to secure the layers together at intervals, preventing them from shifting while you prepare the fringe․ This step ensures that each strip from the top and bottom layers aligns correctly for tying․
Finally, double-check the fringe alignment and spacing․ Make any necessary adjustments to ensure the strips are evenly distributed around the blanket․ Proper preparation of the fringe is essential for achieving a professional-looking finish․
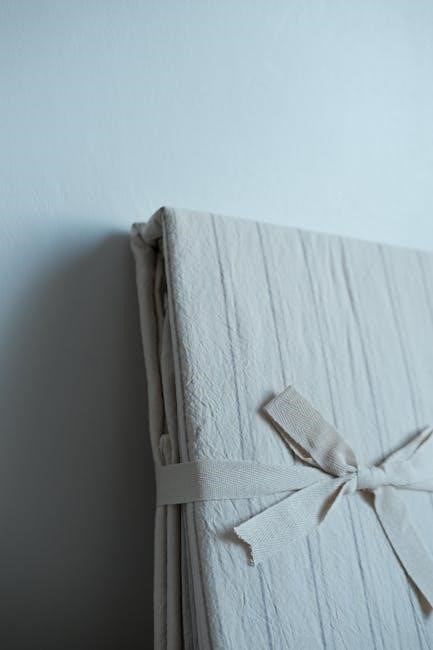
Tying the Knots
Double-knot each strip for added security, making sure the knots are consistent in tightness and placement․ Work your way around the blanket, tying each pair of fringe strips one by one․ Maintain even spacing to create a uniform appearance․
As you tie, gently pull the fleece layers taut to ensure the blanket lies flat․ Use a small object like a ruler or your hand to hold the fabric steady, preventing it from bunching․ Once all knots are tied, inspect the blanket to ensure no strips are loose or uneven․
Finally, fluff the blanket to soften the knots and spread the fleece evenly․ This step enhances the blanket’s texture and ensures a cozy finish․ Tying the knots is the most time-consuming part of the process, but it’s also the most rewarding, as it brings the blanket to life․
Tips for a Perfect Finish
To ensure a polished finish, maintain even fringe length and tie knots consistently without over-tightening․ Use a ruler for accuracy and fluff the blanket to achieve a soft, cozy texture․

Ensuring Even Fringe
Achieving uniform fringe is crucial for a professional-looking tie blanket․ Start by measuring and marking the fleece edges every 1 inch, ensuring consistency across all sides․ Use a ruler or rotary cutter for precise cuts․ Lay the fabric flat on a stable surface, such as a table or cardboard, to prevent shifting․ After cutting, double-check the fringe length to maintain uniformity․ To avoid mismatched strips, align both layers of fleece before trimming․ For accuracy, use safety pins to secure the fabric in place, ensuring the edges are flush․ By carefully measuring and cutting, you can create a blanket with evenly spaced fringe, enhancing its overall appearance and comfort․
Securing Knots Properly
Securing knots properly is essential for a durable and polished tie blanket․ Begin by tying a square knot (right over left, then left over right) around the fringe strips, ensuring each knot is snug but not overly tight to avoid puckering the fabric․ Work consistently around the blanket, tying each pair of fringe strips together․ For added security, tie a double knot if desired․ After completing all knots, inspect the blanket to ensure no loose knots are present․ Gently tug on each knot to tighten it without damaging the fleece․ Properly secured knots will prevent the blanket from fraying or coming undone over time․ By following these steps, you can create a tie blanket that is both functional and visually appealing, ensuring it remains a cozy and lasting creation․